USD
USD EUR
EUR GBP
GBP CAD
CAD AUD
AUD CHF
CHF HKD
HKD JPY
JPY RUB
RUB BRL
BRL CLP
CLP NOK
NOK DKK
DKK SEK
SEK KRW
KRW ILS
ILS MXN
MXN CNY
CNY SAR
SAR SGD
SGD NZD
NZD ARS
ARS INR
INR COP
COP AED
AED
- Description
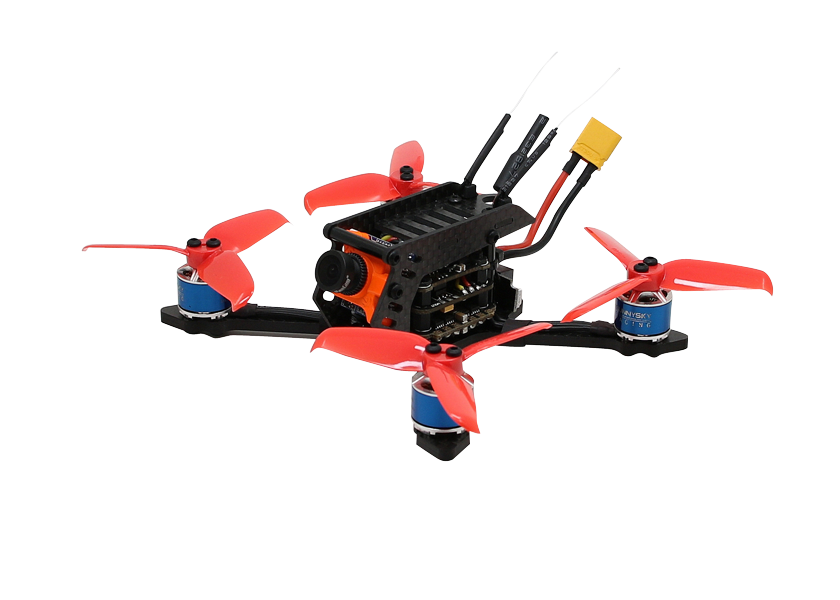

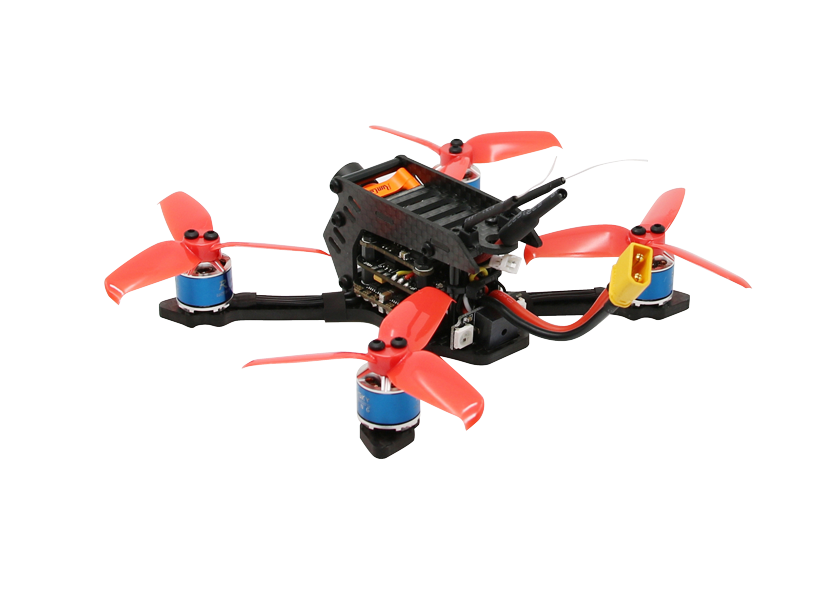
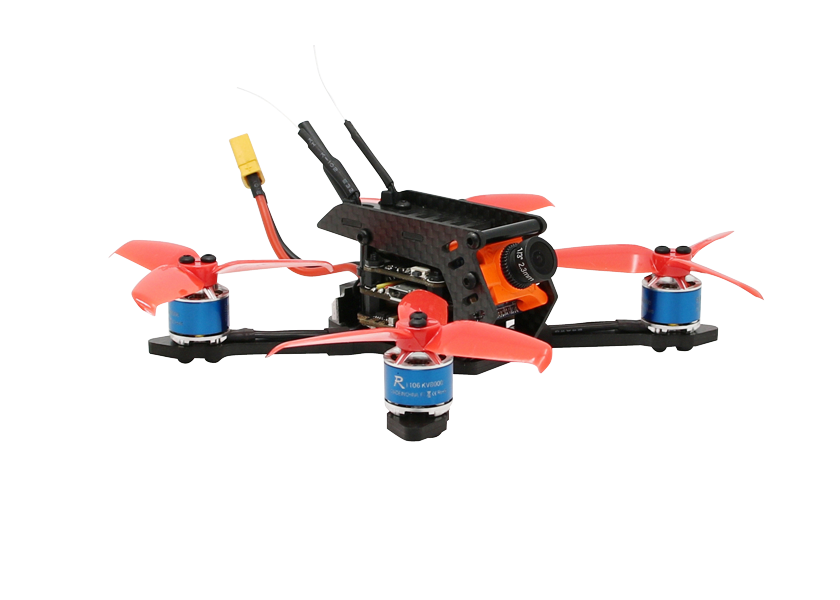
Brand name: SPC Maker
Product model: SPC 110VT
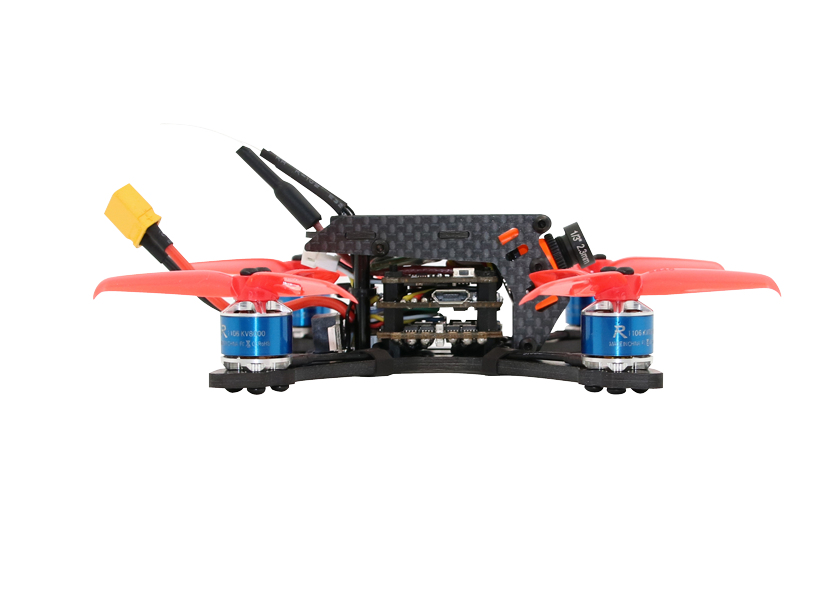
Wheelbase: 110mm
Size: 88mm*104mm*34mm
Weight: 84g (without battery)
Flight weight: 116g(Include battery)
Motor:1106 5500KV brushless motor
ESC: 20A Mini 4 in 1 BLheli_s ESC (2-4S LiPo)
Propeller: 2.5 inches 3-blades propeller
Receiver: Receiver: Frsky/DSMX/Flysky/Futaba(optional)
Camera: RunCam Micro Swift 2 1/3 "600TVL FPV camera 2.3mm lens CCD camera
VTX: 5.8g 25MW-100MW 40CH Video transmitter
Flight controller: Omnibus F4
OSD: Betaflight OSD
Firmware of flight controller: betaflight_3.2.0_OMNIBUS F4
Flight time: 3 minutes
Rear LED Ready( LED_Strip function)
Buzzer Ready
Battery: 11.1V 350mAh 60C lipo battery
VX86-1 Ominibus F4 flight controller
Specification:
Name: VX86-1 MINI F4
Input:2-4 Cell LiPo
Bec:5.1V@1.2A
Firmware:OMNIBUS F3
Size: 27x27 mm
Mount holes: 20x20 mm
Weight: 3.5 g
Features:
-STM32 F303 MCU
-MPU6000 6 axis SPI Gyro & Accelerometer
-Dshot support
-Drag and Drop OSD configured via Betaflight Configurator
-SBUS/PPM AND Spketrum dsm-x Ports
-On-board Video Filter(only can supply 5V to VTX and Camera)
VX86-2 20A 4 IN 1 DSHOT ESC 2-4S Lipo
Specifications:
Continuous Current: 20A
Burst Current: 25A≥10S
Input Voltage: 2S-4S LiPO
BEC:No
Dimensions: 29x31mm
Weight:4.9g
Firmware: BLHeLi_S
Input signal:Dshot150&Dshot300
&Dshot600(PWM are not recommended)
VX86-3 25mW/100mW 5.8G 40CH 5645-5945MHz VTX
Specification:
Model: VX86-3
Input voltage:5-6V
Power:25mW/100mW can be select
Operation Current:310mA@5.5V@25mW/350mA@5.5V@100mW
Frequency range:5.8G 40CH 5645-5945MHz
Dimensions:17x22mm
Weight:2.5g
Features:
Independent external power amplifier for better signals.
Code description: /u_file/1711/file/dbc9c09411.pdf
Parameters
Model : RunCam Micro Swift 2
Image Sensor: 1/3" SONY Super HAD II CCD
Horizontal Resolution: 600TVL
Lens:2.3mm Lens(M8) FOV145°
Signal System:NTSC
S/N Ratio:>60dB (AGC OFF)
Electronic Shutter Speed :1/60~100,000
Auto Gain Control (AGC) :Yes
Back Light Compensation (BLC):Yes
Min. Illumination:0.01Lux@1.2F
WDR:D-WDR
DNR :2DNR
Day/Night:Color/Auto/B&W
Power:DC 5-36V
Net Weight:5.6g
Dimensions:19mm*19mm*19mm
Compatible:
1.DSM2 Receiver Support Spectrum/JR(DSM2 protocol) DEVO10/DEVO 7E(with deviation firmware).
2.Frsky Receiver Support FRSKY taranis X9D/X9D PLUS(D16 mode),and XJT (D16 Mode),DJT DFT DHT Transmitter.
3.Flysky Receiver Support FS-I6FS-I6X.FS-I6S.FS-TM8.FS-TM10.FS-I10 and other second-generation AFHDS 2A protocol remote control
4.Futaba Receiver Support TM7,TM8, TM10, TM14 T6EX-2.4G,7C-2.4G,T8FG,T10CG ,T12FG.T14SG.
Receiver Setup and Binding Methods
Quads with DSM Compatible Receivers
Binding method for Spektrum radios:
Pair code: (for code, not external battery)
1. The receiver for the Cleanflight, Betaflight firmware flight control, you can enter the CLI command line
2. (set spektrum_sat_bind = 9 )carriage return,
3. In the input (save) carriage return.
4. Disconnect the USB cable, re-power to the flight control, the receiver orange indicator light will flash, said the receiver into the code waiting mode.
5. Open the remote control, the remote control into the code mode, the success of the code, the orange light is always bright, no signal, orange light off.
Quads with FrSky Receivers
Binding with FrSky Taranis X9D Plus Transmitter
1.Turn on your Taranis X9D Plus transmitter,goto“Model Setup”(Press MENU and PAGE button once).In the“Internal FR”section,choose Mode=D16,Channel Range=CH1-16,Receiver No.01,and then click“Bind”,the transmitter will start beeping.
2.Power up the XM+ receiver while holding the F/S buttn(aka.Bind button).The LED on the receiver will start flashing,that means binding has completed.
3.Power off Transmitter and Receiver
4.Turn on the transmitter and power on the Receiver,you should see the Greed LED on the receiver,that means it has bound with your transmitter.
Quads with FlySky Receivers
Binding method for FlySky radios:
Support radios with the second generation protocol (AFHDS 2A).
1.Enter the binding mode in the radio.
2.Hold the binding button on receiver, and power it on. Rapid flash of LED indicates the receiver is in binding mode. If binding is successful, the LED light will change to slow flash.
3.Exit binding mode of the radio. The LED light on receiver should become solid, indicating completion of binding.
Enable s.Bus mode:
Output modes can be switched in lieu of normal communication between radio and receiver. Hold the binding button for 2 seconds to change to s.Bus mode. If LED light flashes rapidly two times and off for 1 second, then it is successfully changed to s.Bus output mode.
Quads with Futaba Compatible Receivers
Binding method for Futaba radios:
Compatible with Futaba radios support FASST.
1.Set the radio to FASST mode. Hold the binding button on receiver and then power it on. The red LED should flash rapidly. Release binding button the LED should flash red and green alternately, and then turns to solid green to indicate a successful binding. It may requires several trials to complete a binding. A solid red LED indicates the binding is not established.
2.Fail safe can be setup in the radio, and can be set after binding process. Hold the binding key for 2-3 seconds, the LED indicator of failsafe will flash rapidly and then turns to solid green, indicating it is in fail safe mode.
Package include:
1 x SPC Maker 110VT Frame
1 x Omnibus F4
1 x Frsky/DSMX/Flysky/futaba(optional receiver)
4 x 1106 5500KV brushless motor
1 x 20A Mini 4 in 1 BLheli_s ESC (2-4S LiPo)
4 x 2.5 inches 3-blades propeller CW
4 x 2.5 inches 3-blades propeller CCW
1 x RunCam Micro Swift 2 1/3 "600TVL FPV camera 2.3mm lens CCD camera
1 x 5.8G 25mW-100mW 40CH VTX
2 x 11.1V 350mAh 30C lipo battery (comes without charger)
1 x WS2812 LED Board
4x3 * 100mm nylon band
2x12mm * 150mm magic band
2x15mm * 50mm back to back with 3M rubber magic belt
1 x XT60 female plug to XT30 male plug converter
You May Like

-
$23.00

")
-
$138.00
")

-
$19.00


-
$25.00

")
-
$125.00
")
")
-
$150.00
")

-
$19.00


-
$22.00

")
-
$205.00
")